

How Do I Protect Myself Against Hackers
Learn simple cybersecurity rules to protect your social media, WhatsApp, and bank accounts. A practical guide to avoid becoming an easy target.

To create a bootable Kali Linux USB from macOS using the terminal, we will use the dd utility. It is a powerful command that works flawlessly; however, you must be extremely careful to select the correct disk to avoid wiping your Mac’s data. If you make a mistake, you could delete your partition, and you will regret it. Double-check every step before proceeding.
Follow these steps with precision:
macOS sometimes handles image files better if they are converted from .iso to .img. Run this in your terminal:
hdiutil convert -format UDRW -o /Users/lmoreno/Downloads/kali.img /Users/lmoreno/Downloads/kali-linux-2025.4-installer-amd64.iso
(This will create a file named kali.img.dmg. macOS automatically appends the .dmg extension).
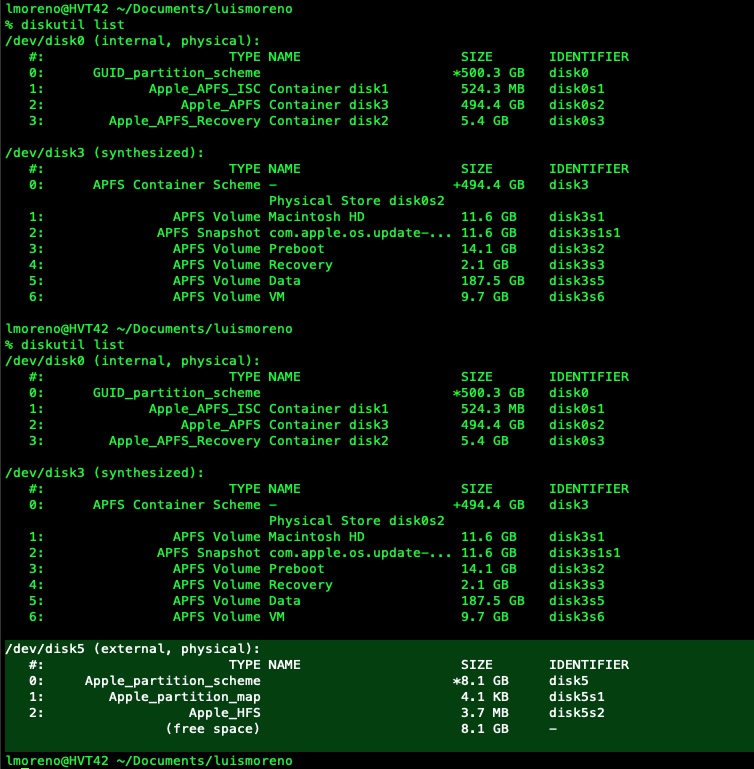
The first step is to identify the path assigned to your USB drive when inserted. In my case, it is /dev/disk5, as shown in the image below. This step is crucial because using the wrong path will result in data loss. Verify the path carefully; you can unplug and replug the USB to see which path disappears and reappears.
To write to the /dev/disk5 disk, we must first “release” it from the operating system so it is not in use.
diskutil unmountDisk /dev/disk5
We will use dd. Note that we use /dev/rdisk5 (with an ‘r’ at the beginning) because “raw” mode is significantly faster on macOS.
Warning: This command will erase everything on /dev/disk5.
sudo dd if=/Users/lmoreno/Downloads/kali.img.dmg of=/dev/rdisk5 bs=1m status=progress
Once finished (it may take a few minutes and the terminal prompt will reappear), macOS might display a message saying “The disk is not readable.” This is normal, as macOS does not recognize Linux partition formats. Click “Ignore” or use this command to eject it safely:
diskutil eject /dev/disk5
That’s it, Happy Hacking!
Learn simple cybersecurity rules to protect your social media, WhatsApp, and bank accounts. A practical guide to avoid becoming an easy target.
tmux cheat sheet